Change Unit
In this section, describe the process when a client needs to change a unit with a new unit.
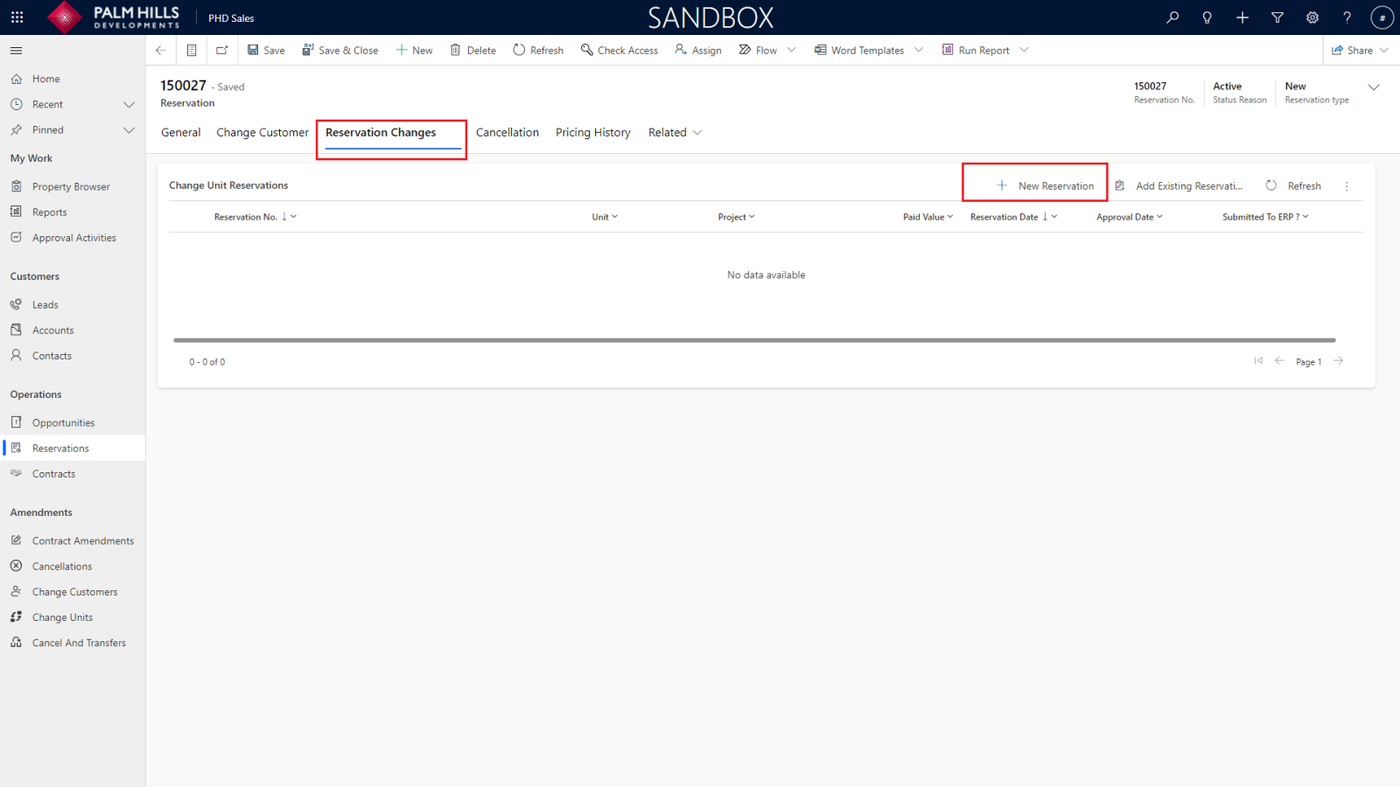
To make changes to your reservation, navigate to the 'Reservation Changes' section, then click on the 'New Reservation' button.
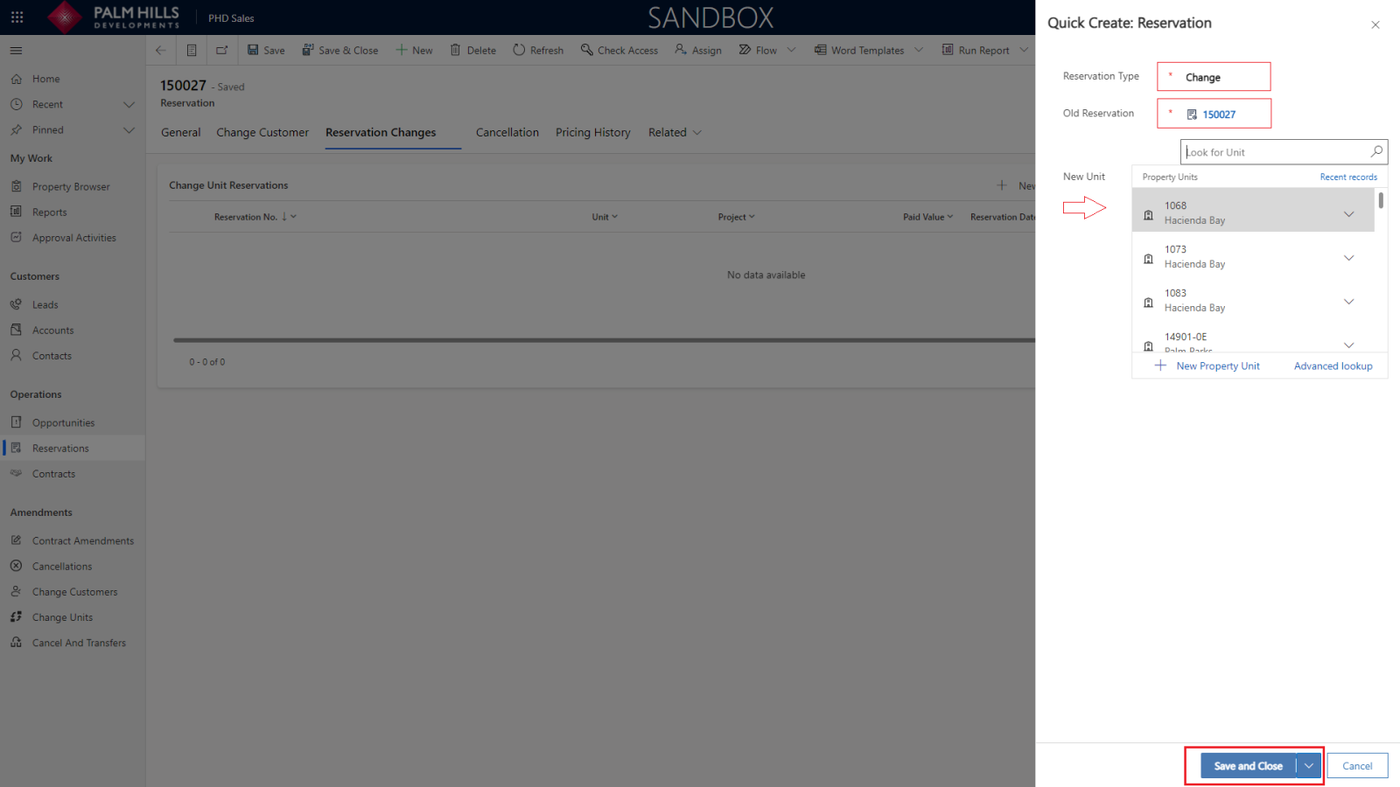
In the quick form for creating changes, the default type is 'Changes.' Select the 'Old Reservation' and the 'New Unit' (from available units), then click on the 'Save and Close' button.
Click on the reservation to view its details and proceed to the next step.

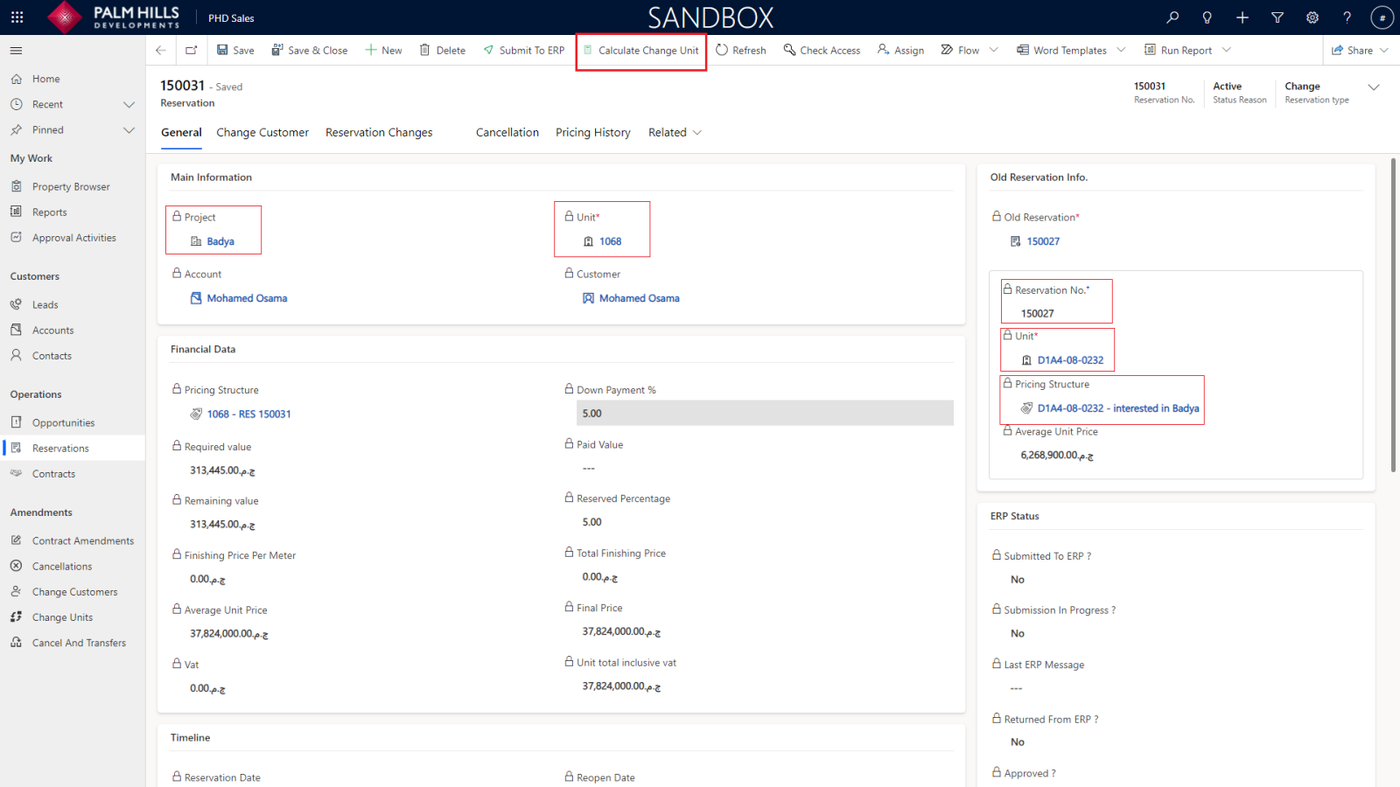
When navigating to the details, you can view the main information about the new unit, and on the right side, you'll find information about the old reservation.
Now, you can click on the 'Calculate Changes Unit' button.
Calculate Changes Unit
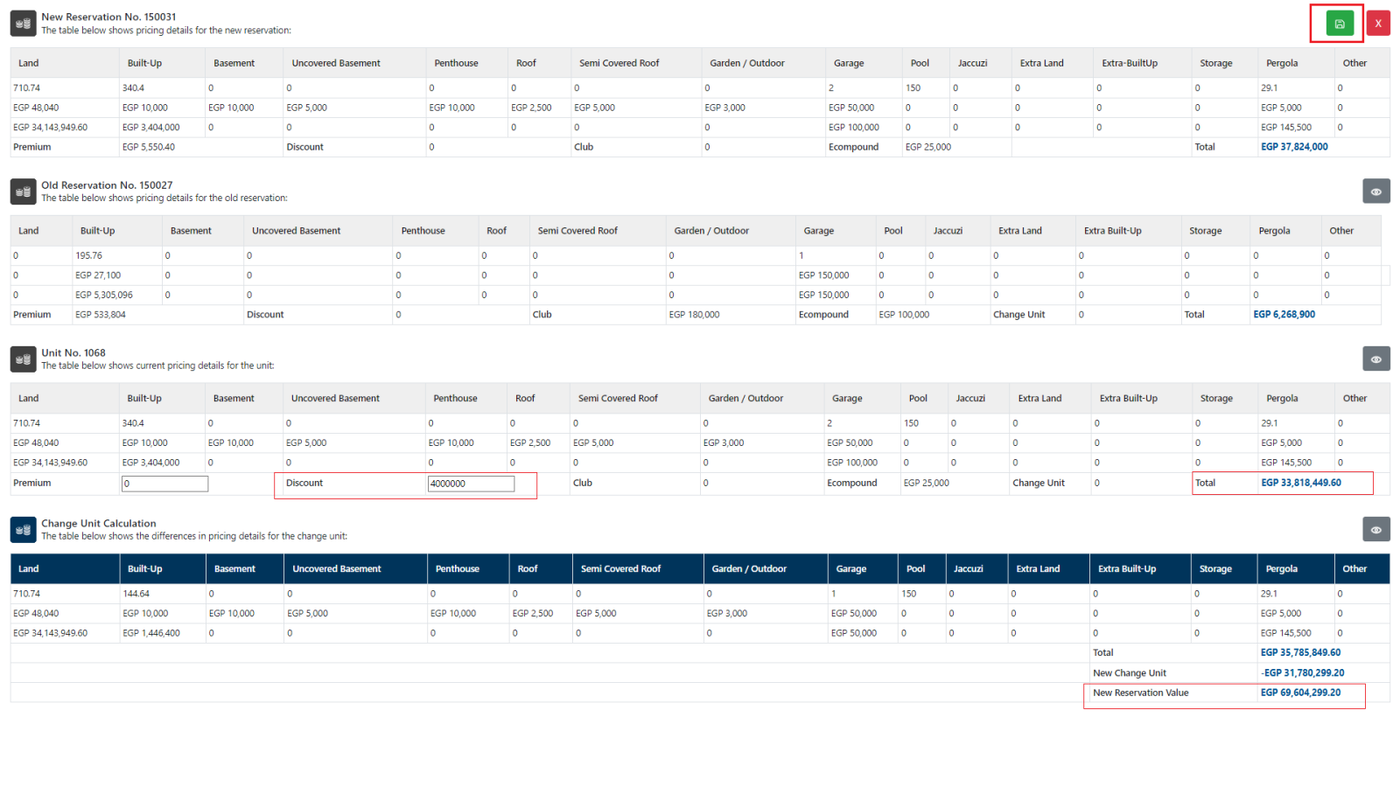
In this blank view, sales can view the pricing structure of the old reservation and the new unit, as well as the change unit calculation.
There are two inputs available:
- 'Premium,' which, when added, increases the total
- And 'Discount,' which, when applied, subtracts from the total. Any changes made will be reflected in the 'New Reservation Value'.
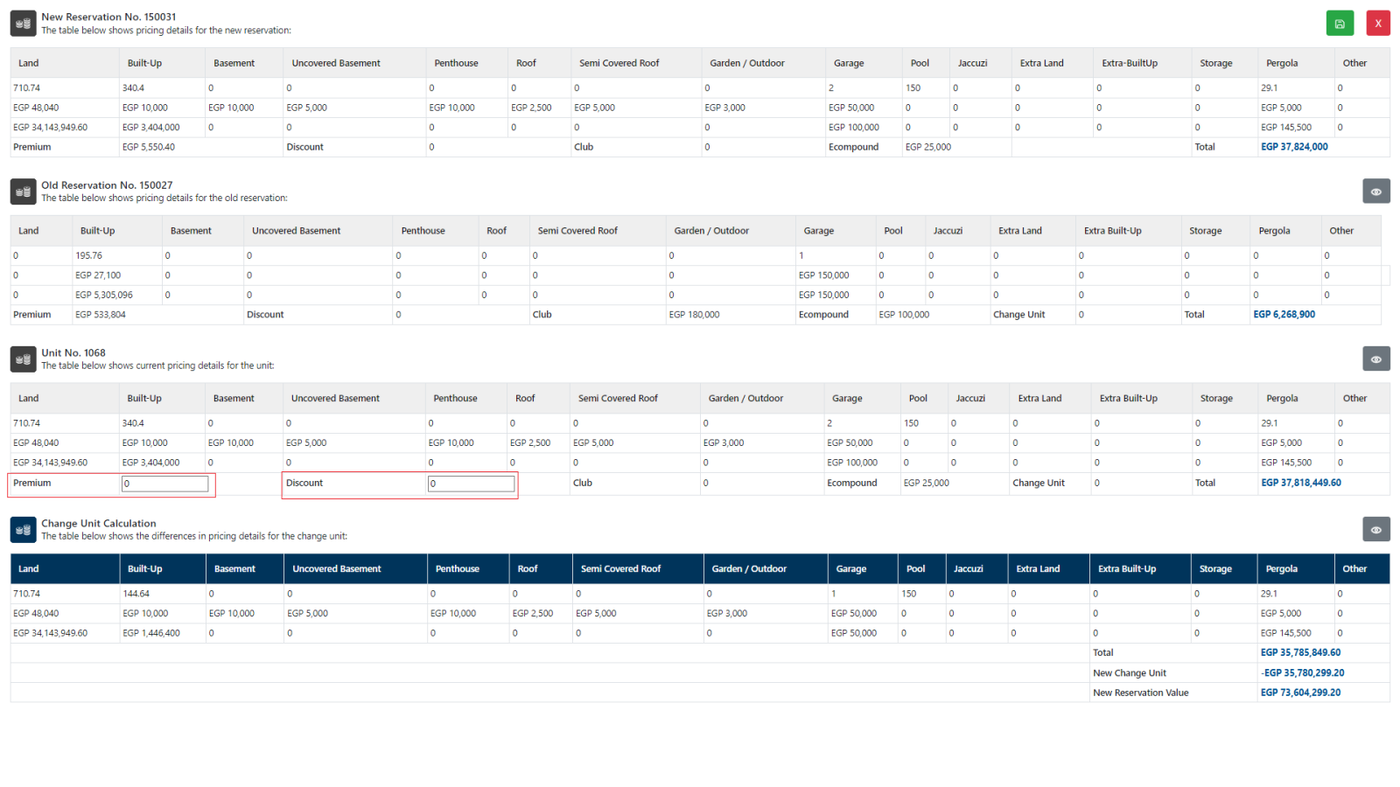
Assuming sales apply a 'Discount' with the specified value, it will affect the 'Total' and 'New Reservation Value.'
Finally, click on the green 'Save' button at the top to save these changes.
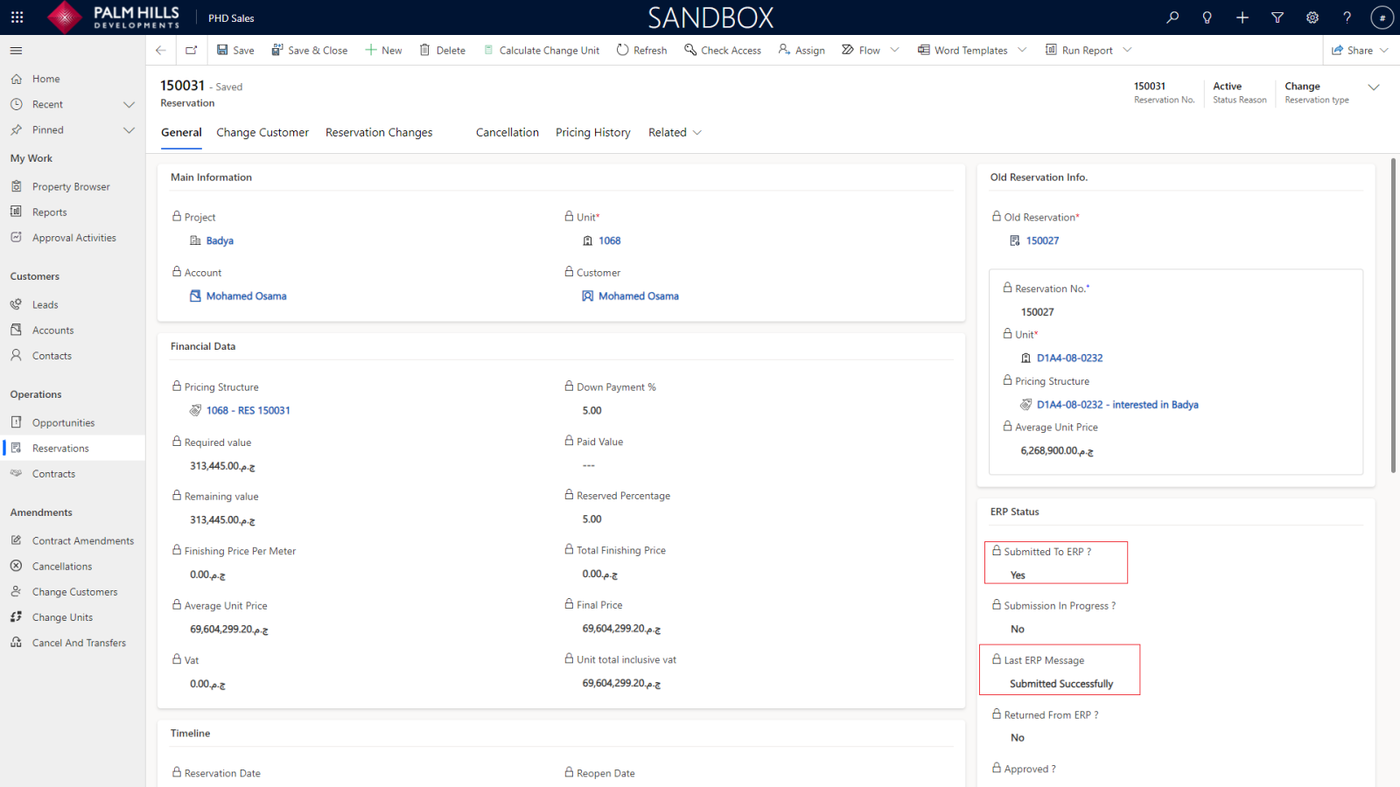
 Now 'Financial Data' is updated and then you can submit by click on 'Submit To ERP' button.

In case it's submitted to ERP and receives approval with Yes.
New Change Unit
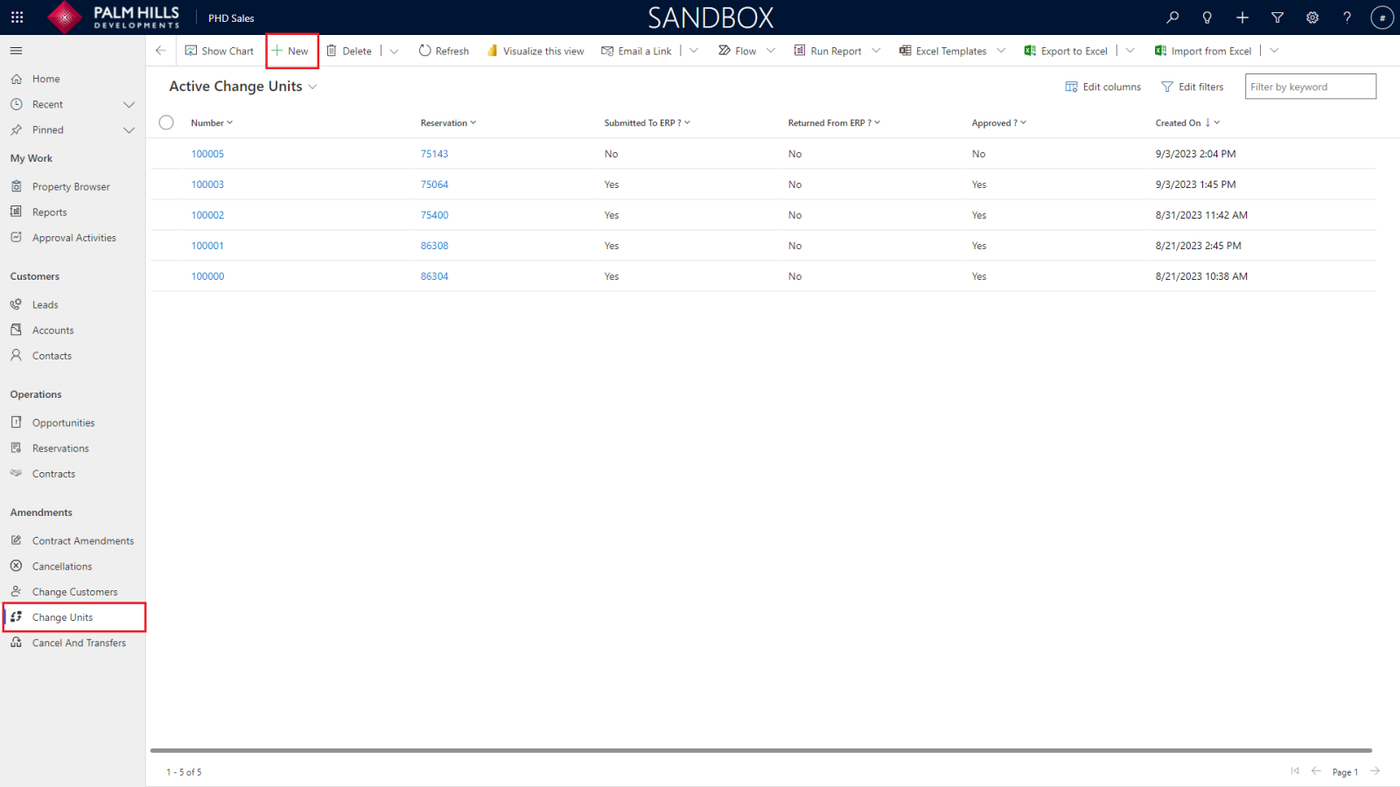
To create a new change unit, navigate to 'Change Units' and click on the 'New' button.
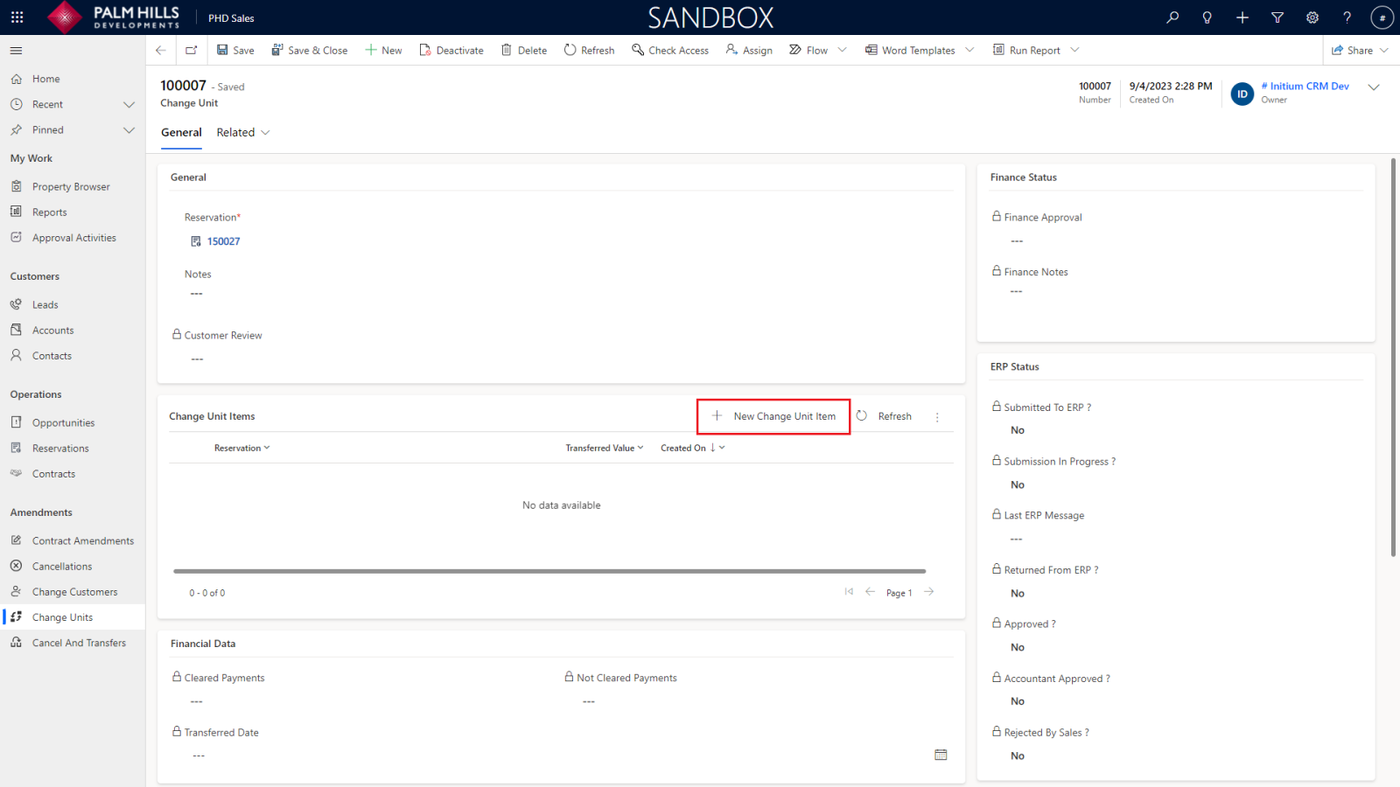
Now, choose the old reservation and click on the 'Save' button to view the 'Change Unit Items' grid.

After saving, click on the 'New Change Unit Item' button to choose one or more unit items.
In the quick form, select a reservation that has already been approved from ERP and is under its parent (Old Reservation). Then, click on the 'Save and Close' button.

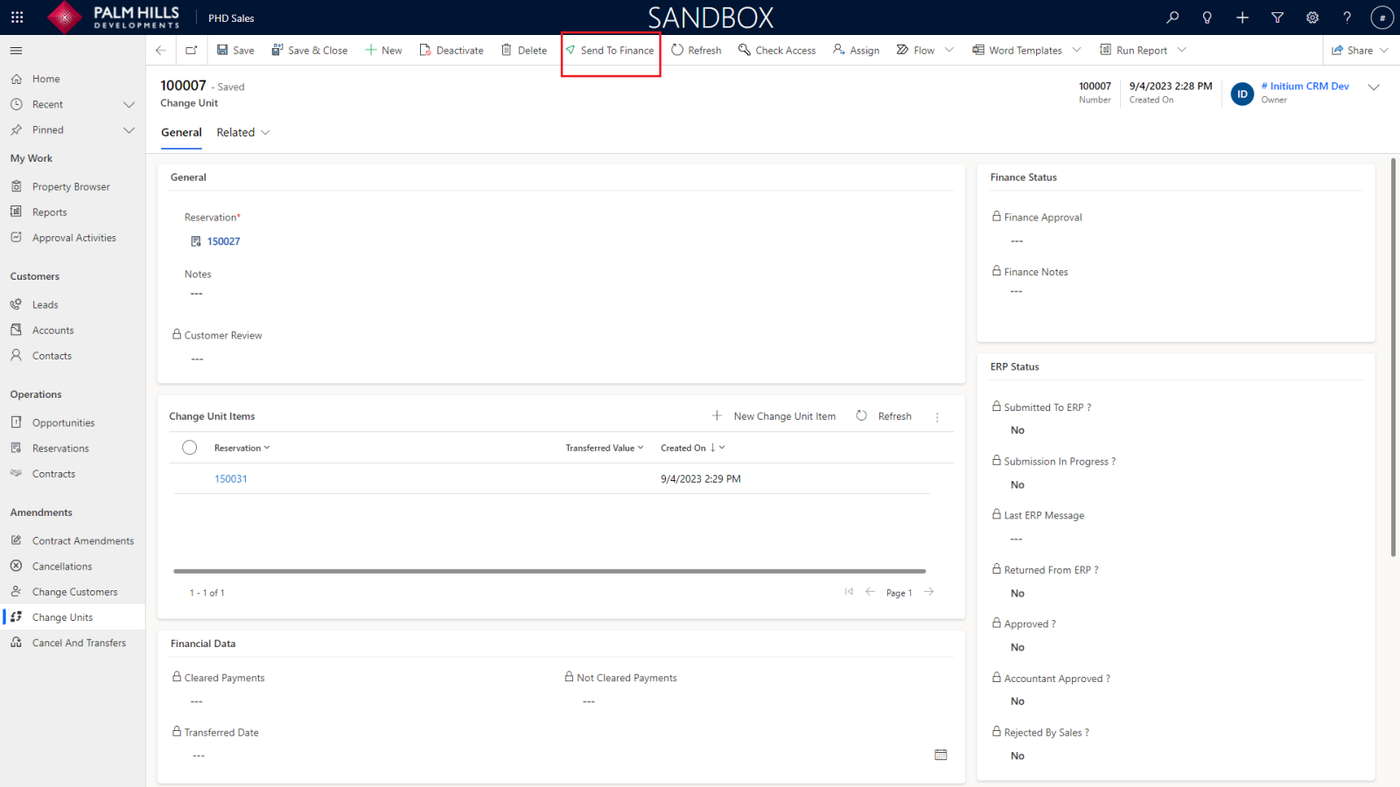
Now, send the change unit to finance by clicking on the 'Send To Finance' button.
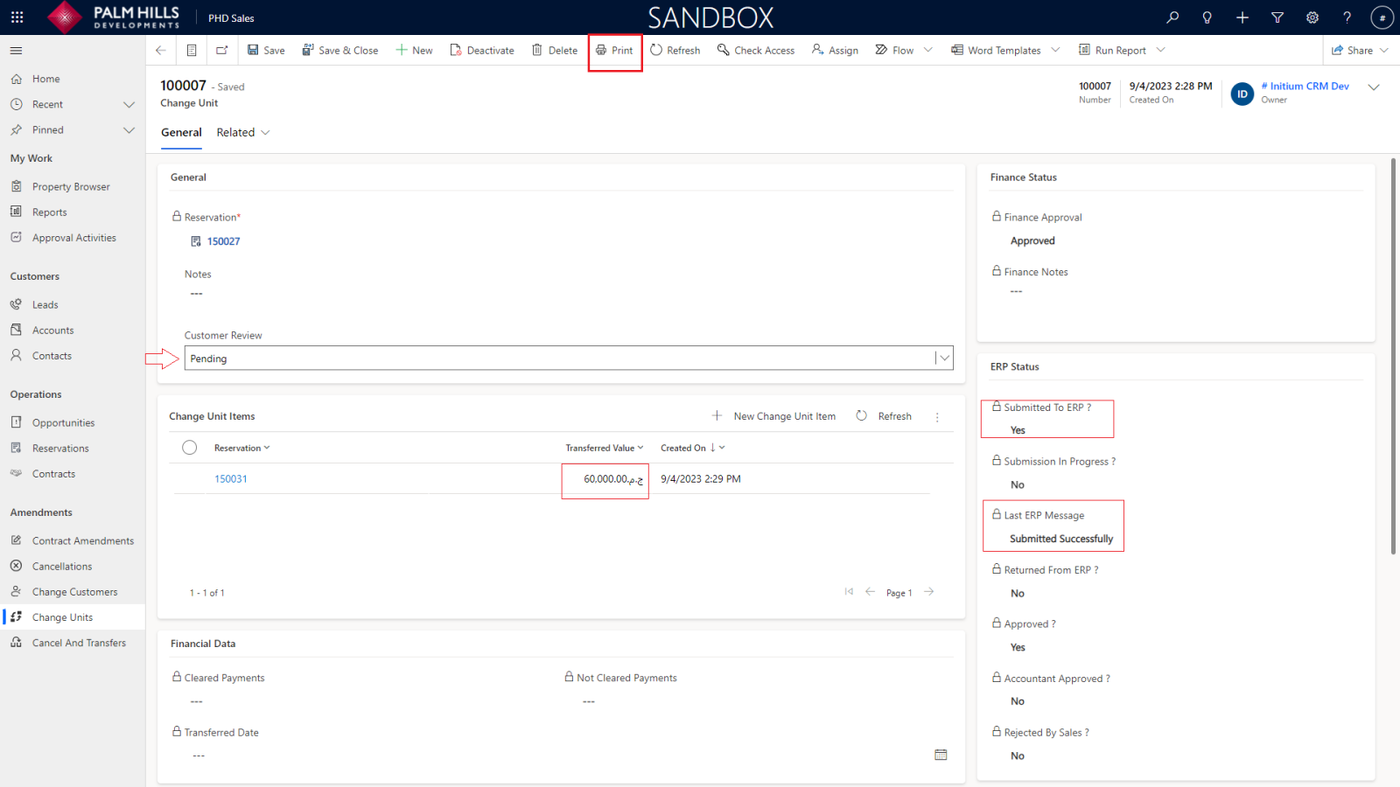
After approval from finance, you can click on the 'Send To ERP' button.

After approval from ERP and setting the transfer value of the change unit, set 'Customer Review' to 'Pending.' Now, sales can print the unit change document from the 'Print' button.
After obtaining approval from the customer, change the 'Customer Review' status to 'Approved'.
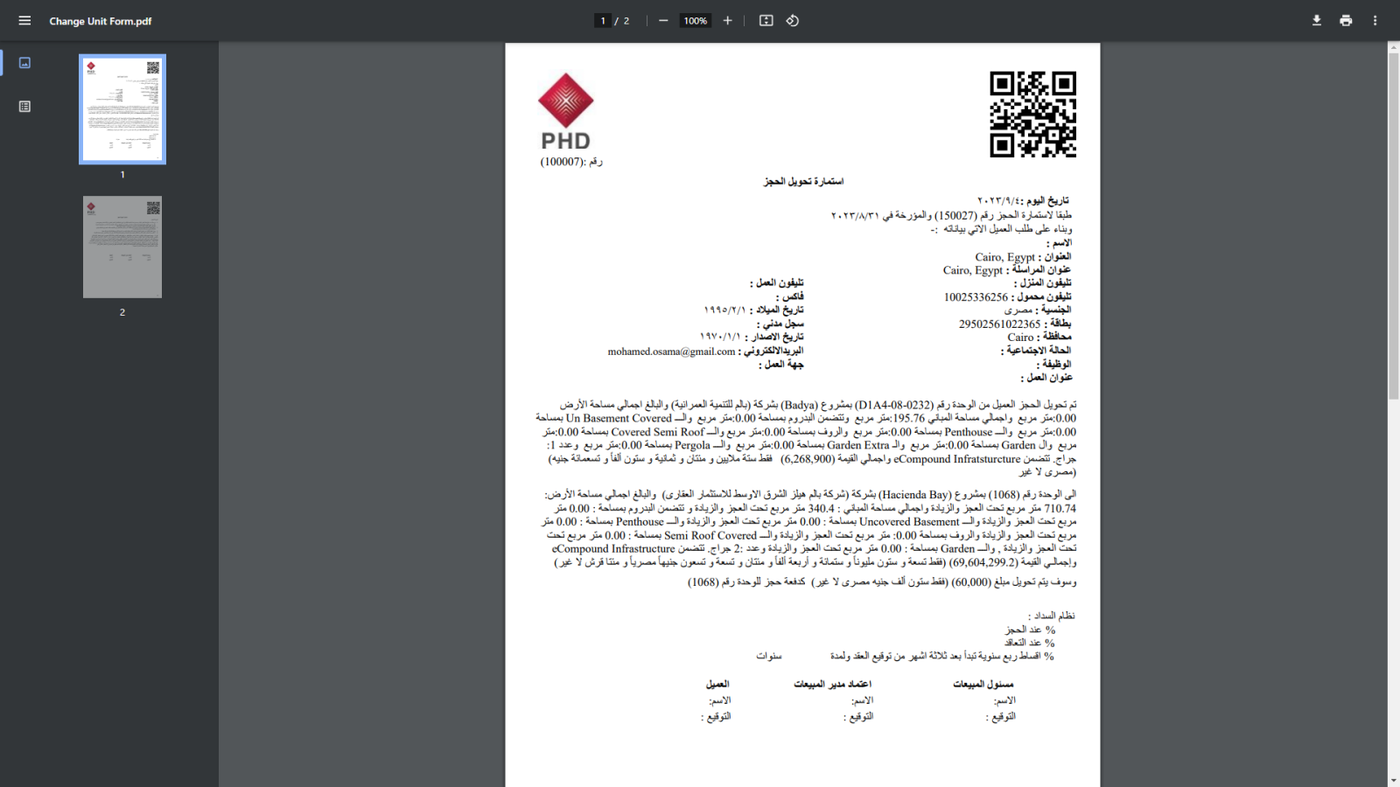
Provide an example of a change unit document that is generated when clicking the 'Print' button.
After approval from the customer, change 'Customer Review' to 'Approved'.
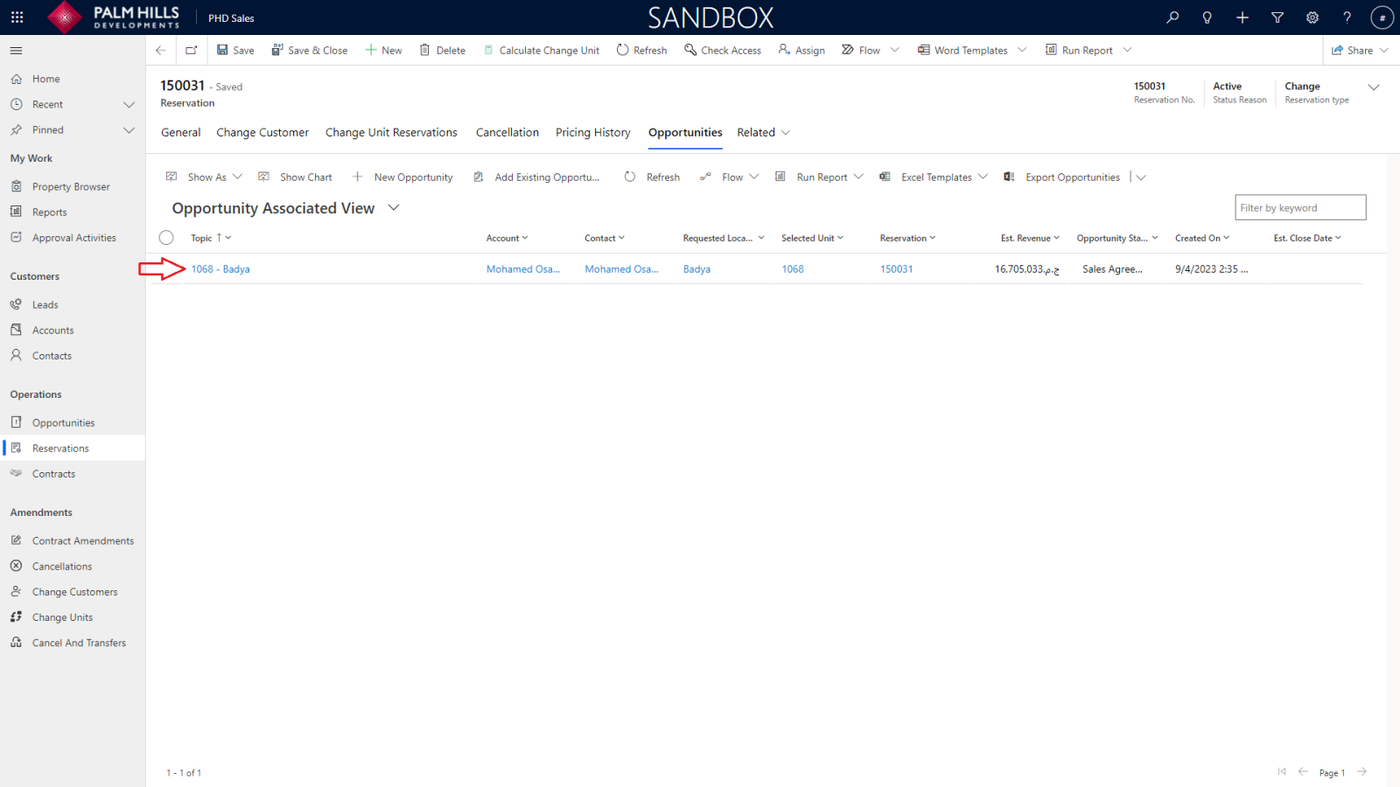
An auto opportunity is created for this reservation. To view it, click on the reservation as below.

To view the opportunity, click on 'Related,' then choose 'Opportunities'.
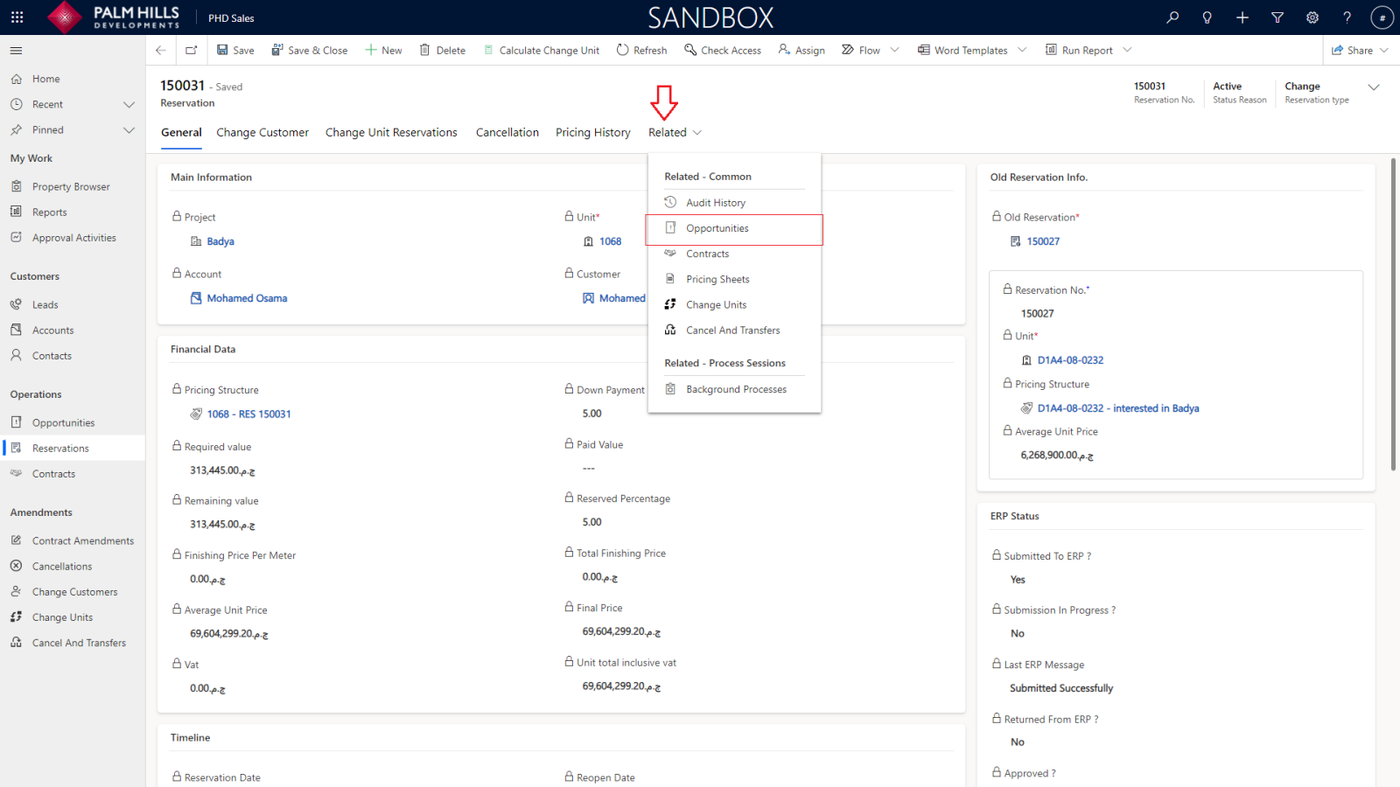
Click here to view the opportunity with unit and details.
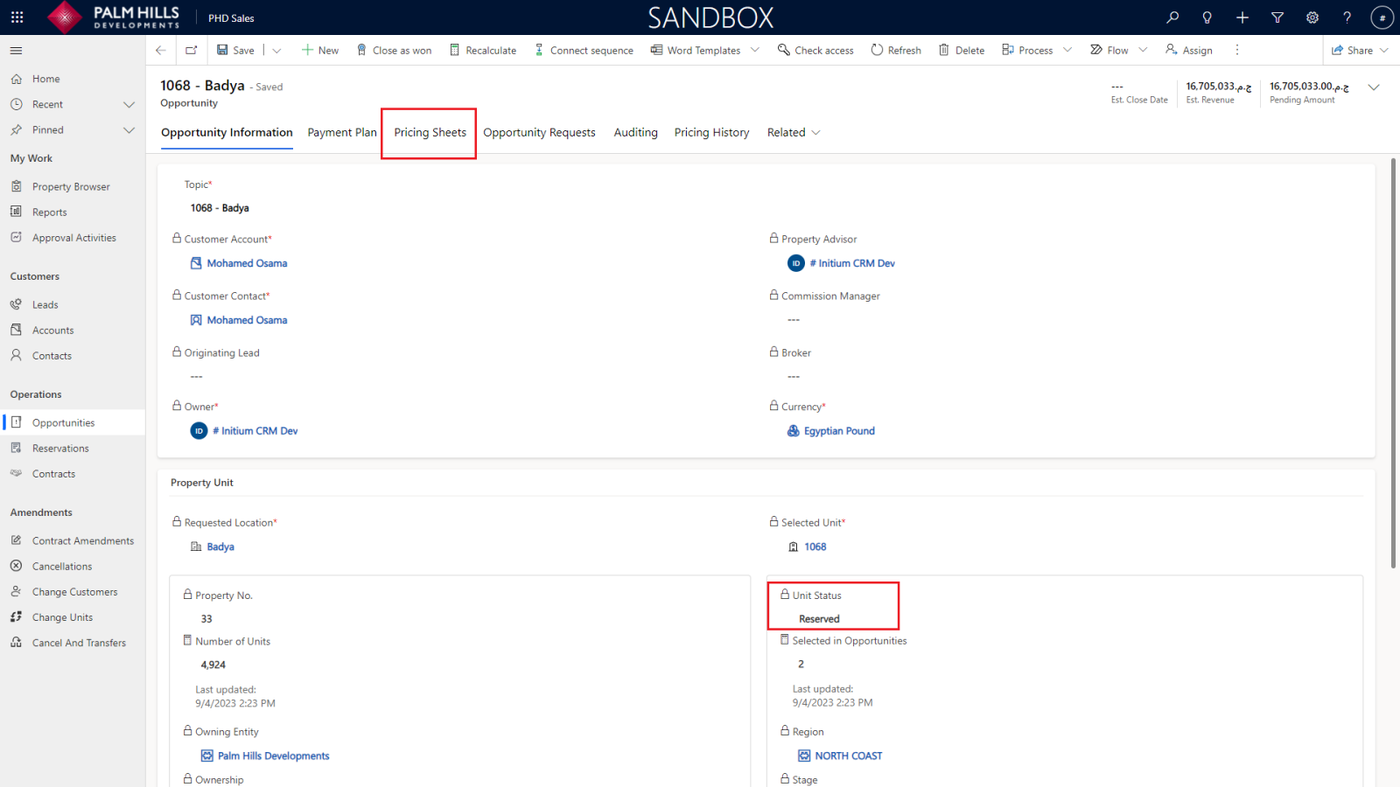
As shown, the new unit is now reserved, and you can navigate to the 'Pricing Sheet' section to continue the normal process until creating a contract and also creating a contract amendment.
Now, if you go back to the old reservation, you will find that the status has changed to 'Cancel.'
Additionally, the unit in this reservation is blocked for repricing, and any contracts or contract amendments associated with it will also be canceled.
